Showing posts with label electronic cigarette review. Show all posts

Friday, March 20, 2015

Goblin RTA

Finally, I have my hands on the Goblin


Is the Goblin taking the vape world by storm? Is it really everything it's cracked up to be?


With ridiculous air flow, four post design, ALL STAINLESS (!!) construction AND under 40 bucks, it is a definitive force to be reckoned with. It does have a few kinks, but at the present time, I am all but sure the v1.2 has rectified most of them. Let's break it down now.


With atomizers, it goes without saying that the quality of the atomizer in question is quintessential. If the manafacturer cut corners, you're going to to run into some difficulty. Posts can spin (or, in one case with a plume veil I had, NOT EVEN DRILLED OUT), screws can strip, decks short, etc, the list goes on and on. So, in the 24.99-34.99 price point, it's a safe bet to assume costs were invariably cut somewhere.

Well, either Youde is really, really good at keeping material and overhead down, or they just know what the community wants. After the animosity surrounding the ceramic wick in the atlantis, the chrome plated brass plume veil clones, and the chrome plated brass aspire mini, Youde listened to the community. Some put too much stock in the brass/stainless war, but I certainly want stainless steel, when available, at all times. It should be the standard, at this point. Copper and brass look fine on a mod, but I do not want any particulate matter in my lungs, and I'm sure nobody else does either.

So Youde decided to construct this bad mother out of solid stainless steel. The drip tip, deck, and chimney are 100% stainless, which is both durable, and SAFE. This is the kind of quality I've come to expect from higher priced authentic devices, and to see a 29.99 down RTA constructed out of stainless steel, is, well... a steal (don't groan, I know that was awful.)

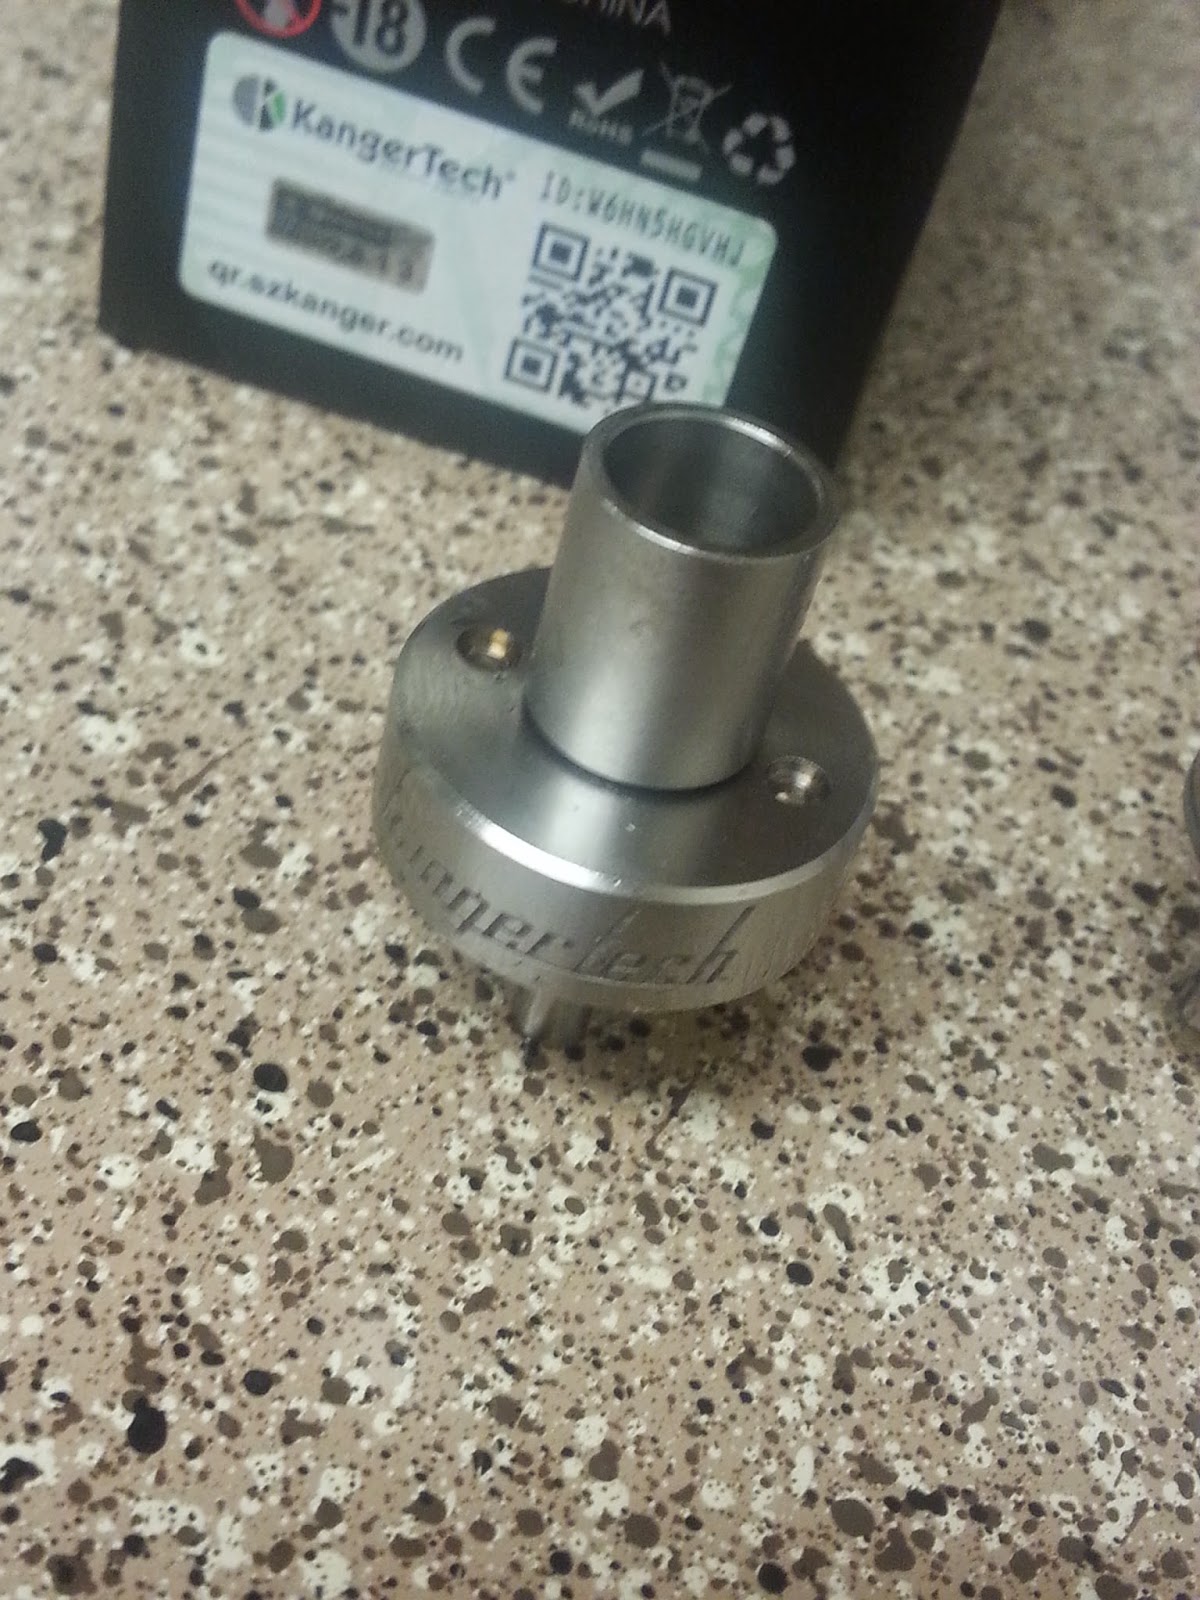
Big plus, in my book. Now, just because it is constructed out of a preferable material, does that also mean the device boasts  similarly admirable usability? Yes, in fact, it does. Everything about the device is built solid. The deck is done exceptionally well, with rigid, straight posts. The screws are a bit finicky with larger wire, but we'll touch on that later. The deck itself is machined incredibly well, with some very unique juice channels. They run all the way down the base, ensuring a perfect vacuum is achievable. The included drip tip is a no frill approach, but has a wide enough bore. The 510 pin protrudes nicely, ensuring a snug fit on most devices, and even hybrid devices. The adjustable pin is solid copper, to boost conductivity.The included pyrex is reasonably thick, and fits like a glove when the tank itself is assembled. I do, however, have a few small complaints.

For one, the deck and chimney are on the small side. This makes builds larger than 2.5mm in a diameter a struggle, and to be perfectly honest, regular builds can be tricky as well. I find the key is getting your leads clipped as short as humanely possible, so that you can ensure the coils are as close to the block as possible. If they're even a touch backed out, when the equally small chimney is screwed down, the coils will touch the wall and short. I had a bit of difficulty adjusting to this, but it is rectified rather easily - 28g wires seems to be the consensus here, as you can get more wraps and maintain a smaller coil. This is something easily overlooked once you get more comfortable acclimating to the space constraints. I can know wedge in builds will relative ease, it just required a bit of a learning curve.

The second complaint is the screw hole on the bottom. This device is fed juice by way of a fill hole, which I have never been a fan of. The provided screw locks into place with ease, but for some reason, the device does occasionally leak - something I observed over the course of a few days. It could be the viscosity of higher VG juice, but for some reason, it does have a tendency to get a bit leaky.

Suffice to say, the Goblin is constructed well. Initially, the community was a bit nit-picky about the 3ml capacity, but Youde quickly introduced a larger tank and chimney, allowing the v1.2 to hold a surprisingly large amount of juice - 5ml, to be exact. Unlike the atlantis, you do not have to buy this extension separately - both the chimney and pyrex are included, which is a nice bonus.


So...let's break down the pros and cons so far.

PROS


  • Solid, full stainless steel construction
  • Ridiculous airflow (3mm, dual)
  • V1.2 includes an extension tube for higher capacity (5ml)
  • 22mm
  • Drip tip included

CONS

  • Deck is on the small side
  • Screws are hit or miss
  • Tends to leak from the fill hole (minimally, but noticeable.)
  • It can be hard to wick the device. I will share a video that was instrumental in getting this to perform to expectations, as the man explains it far better than I ever could.

So far....it's a very, very good start. The pros far outweigh the cons. Now, if you're wondering how it performs...


It's an absolute monster. 


The Goblin v1.2 is a lean, mean, asskicking RTA machine. Though the design may need refining ever so slightly, it's an absolute beast of a tank, giving the closet RDA experience, in RTA form. The dual 3mm airflow is just as big as the mephisto! It's larger than the sub tank, atlantis, lemo, billow, etc - it just puts the majority of the market to shame. With the right build, and wicking, you can get serious sub-ohm clouds, and flavor to boot.

I was, in all honesty, absolutely blown away by this device. Before I go on further, let me back peddle abit.

The Goblin has four channels, which need to be delicately taken care of, in order to ensure optimal performance. I could give you a run down, but I found a video that explains in the greatest of detail how to get this thing rocking and rolling, with absolutely NO dry hits. I struggled getting consistent hits, until I stumbled upon this. Do yourself a favor and give it a look - this man has it down to a science.


Okay...so, if you managed to sit through that incredibly long video, I applaud you, and hope you're well on your way to enjoying the device.

Once the build is perfected, their is absolutely no competition. The goblin can keep up with chain vaping, high VG juice, you name it. It seems that the science behind it is perfecting the wicking - and though it may be a continous process of frustrating trial and error, it is absolutely worth it. My experience with RTAs is minimal, but I can tell you that it gave me a far more enjoyable experience than the likes of the lemo, the billow, and the kayfun v4. It's on it's way to become an industry leader, and I see future revisions as the king of the RTA game.

Personally, I find it to be hands down, the best experience outside of an RDA. If you're looking to chase clouds and flavor, this does it all in stride. It is an absolute blessing, as I can now drive and work around the house without taking a pause to get a nice, dense, flavorful cloud.


It's a no brainer. Stop by www.mtbakervapor.com and use coupon code VAPOCALYPTIC and pick yours up today!

Sunday, March 1, 2015

IPV MINI 2 70W

Hello everybody! Today, I'll be reviewing the IPV Mini 2 70w box mod by Pioneer4you. The box was provided to me by my good friend Jonathan over at www.alluringvapors.com. Make sure you stop by, take a look around - his prices are competitive, and he has a wide selection of premium juice, the latest and greatest box mods, and plenty of other things. Let's get cracking


Features and Specs:

  • 510 Threaded
  • Loading resistance: 0.2 ohm - 3.0 ohm
  • Output Voltage range: 3.6 V – 8.5 V
  • Output Wattage range: 5.0 w – 70 w
  • YiHi SX330V2C chip
  • Floating top pin
  • Visual operating system
  • Low voltage protection
  • Low resistance protection
  • High input voltage warning
  • Output short circuit protection
  • Reverse battery protection
  • Dimensions: 3-3/4"L x 1-9/16"W x 7/8"
  • Utilizes one 18650 battery (removable and sold separately)


Okay, so. At this point in the game, the market is becoming saturated with box mods. You have your Sigelei 100, 100+, 150, mini versions, the IPV 2, 2S, mini, 3, 4,....I could go on and on. It's a safe bet to say that the community is gravitating towards these devices; forgoing the now seemingly ancient tubular mechanical mods in favor of sleek, chip powered, variable voltage/wattage devices. I'm going to just say it, I think this is a move in the right direction. With chip controlled devices, we're able to utilize a wider range of builds, chase clouds without getting into low ohms (not that their is anything against this, those devices/users will always have a place in this community) and offer a reasonable amount of safety (in comparison to mechanicals, at least.)

With that said, I've covered the Sigelei 150w, Cana DNA 30, have the iStick 30w coming up, and I found myself holding the Mini in my hand, vaping away, asking myself.....is this outdated already? I mean, I've got 150w of power right across the room, and various 30w devices...my answer is no. Devices like the IPV Mini 2, hell even any device under ~70w, will always have a place in the market. I know quite a few people who rarely exceed 50 watts, some even 20 - personally I hover between 70-120 myself, but it's all subjective. In my opinion, the IPV Mini 2 is a decent enough device; with it's limitations. Let's break it down now.


The first thing I thought of when I had this device in my hands was, "Huh...it's like the VTR, but smaller." Though the form and certainly function are considerably different, it has a certain heft to it like the VTR, before it inevitably became a ghost on the market. I, for one, was actually quite impressed. I compared it to the larger, decidedly bulkier Sigelei 150w, and it is considerably heavier, and feels a bit more...premium. This is largely due to the all aluminum construction and space saving in the Sigelei, but regardless, the heft definitely reinforced my opinion on the build quality. To some, it may be a touch heavy, but I think this is mitigated with the sleeker, smaller design. It can weigh down a bit, but it's small enough that as the day progresses, I tend to not notice.

The 510 threading is...decent, and that's being modest at best. I found it a bit of a chore to get atomizers to thread, and fear the threads may weaken, even cross thread, at some point. The diameter is equal to 510 devices, however it feels slightly narrow, requiring precision placement and threading in order to get your atomizer to catch. Speaking of the 510, the floating top pin is a bit finnicky...some atomizers thread flush, but still require a few more turns to get nice and snug. I think that this could eventually lead to a mishap, potentially damaging the floating pin. I, personally, recommend that you try and avoid swapping atomizers consistently - not because it can't handle it, but due to the wear I can envision down the line. I myself paired it with a Mutation v2, and their it will stay...not everybody can do that, but I personally do.

The LED screen is functional, as expected, featuring the simplistic affair we've come to expect from the IPV series. It displays the resistance of your atomizer, your wattage, the voltage, and your battery level. If you have a short, or you've built to low, it'll flash check atomizer. Simple, functional, nothing more to it really.

The buttons on the device are rock solid...Responsive, tactile, and delightfully clicky. I used this mod extensively for three days, and have yet to have an auto fire, or any unresponsiveness.  The power button is larger enough to compliment the slim profile, allowing you to always access it with a firm press. One thing I noticed is that the buttons to adjust the wattage up and down are extremely close to each other, so if you're trying to adjust the wattage with your thumb, you may have to take a closer look - the second nature you're accustomed to may fool you, and you just may raise/lower the power in error.

The innards of the device are perhaps my biggest gripe with the device. Their is little in the way of protection - perhaps I am used to the insulation on the Sigelei, or even the Cana, but this has everything exposed - the chip, all the wiring, everything. Upon further inspection, everything seems to be soldered and glued properly, but one wrong move with a leaky atomizer and you run a huge chance of frying the device. Thankfully, you rarely, if ever, have to access the inside of the device - instead of removing the back plate to install your battery, the IPV 2 Mini has a small aluminum switch that is removable, similar to a mechanical mod. It's a catch 22 (I'll get to it briefly) because on one hand, you don't have to deal with the awkward screws (not to mention on tool is included...seriously Pioneer, let's get with the program. MAGNETS.)


If you can get the damn thing in there. The battery housing is a touch narrow, so most batteries do not "fall into place" and require a gentle nudge to get in. I could definitely live with that, if it weren't for the horrible threading on the cap. The threads are small, and not well machined, making it difficult to screw on. The switch requires precision accuracy, and don't be surprised if you're fumbling with it, trying to get it into place. Due to this, I've got to say, I would've really preferred a battery door, because this cap will cross thread very, very easily if you are not careful. Outside of the somewhat sloppy inner components, this is by and large the biggest fault I can give the device. 


The device can be charged via USB, which largely eliminates a lot of the problems I've mentioned. Simply marrying a battery to the device and charging via USB seems the smartest choice, but it does come with a few limitations, one being that it charges a bit slower. I'd also like to point out that you technically can use it as a pass through, Pioneer4You recommends against it, as it can damage the chip. You also never, ever want to leave it unattended on the charger after complete, as it can catastrophically damage the device and battery.

The battery life is what you'd expect out of a single 18650 - if you're running this at full power and vape consistently, expect to go through two batteries a day. If you're comfortable around 20-40w, one battery should last most, if not a whole day. With my subtank at 1.2 ohm, I vape pretty heavily throughout an entire 8 hour shift at 23w, and it was a little less than halfway when I got home. Dual batteries in, but people like me will never forget the single 18650 devices - especially at those crucial moments when I'm charging two batteries!

At this point, you're probably asking yourself if it's worth it. While you can find similar devices offering higher wattage for pennies more, let me tell you, I think it's a decent backup box mod to have around. At around 69.99, it's a great device to have on hand as a backup. I personally have a charged battery in it at all times, in case my Sigelei dies on me. It also doubles as a great device to have in the car, in case I forget my main carry for the day. 70 watts is an ample amount of power, even for the most serious cloud chaser. I was skeptical as I have fallen in love with 120w+, but with a nice twisted build sitting at 0.5 ohms, full power, I get a warm, dense, flavorful vape. I was actually a bit surprised, and could potentially rely on this as an every day device.

With all that said, it is what you'd expect from a sub 70 dollar device. You aren't going to get the latest and greatest chip, updates, precision machining etc, but rest assured that if you can ignore the quirks and some stupid design choices, the IPV Mini 2 remains a reasonably solid device. It boasts a tried and true chip, USB charger, the ability to fire down to 0.2, a very sleek profile, a solid amount of power, decent battery life, and remains affordable. If you're looking to stay under 100 but want to get past 30, even 50, I'd definitely recommend picking up the device. If all else, it doubles as a solid backup.


Mutation V3


This will be brief, because Indulgence did not make any astromical changes, and you can get most of the information from my review on the v2.

The Mutation v3 is the latest iteration of the ultra popular Mutation RDA, and thankfully, the concerns voiced over the v3 were addressed, notably with phillips head screws. The v2 featured these odd triangle screws, which stripped, (and so did the cheap tool provided), not to mention making the device extremely hard to build on. The biggest (and most welcomed) changed is the old faithful phillips head screws. Now, building on the device is easier than ever.

Let's get some quick specifications.

Features:
  • HUGE Adjustable Airflow - 18 holes!
  • New insulator (rated to 280 degrees C)
  • Dual negative poles - built into base
  • Central positive post block
  • Heat sink top cap
  • Large Juice Well
  • Silver coated contact pin
  • 22mm Diameter
  • Wide-bore Drip Tip
  • Single-airflow option
Essentially, it is the same dripper, with phillips head screws, a higher rated insulator, and a removable adapter than can accomdate standard sized drip tips. I personally didn't think this was an issue until I used a a regular sized drip tip. The larger bore may have chucked an ample amount of clouds, but offered very little in the way of flavor. I was blown away by just how good the flavor out of this thing is - the air holes have been slightly altered, angled, in order to create a vortex of vapor. This swirling of vapor and air creates sizable clouds and ridiculous amounts of vapor.

To be brief, the v3 is built incredibly well. The top cap sits perfectly on the base, which sports one of the easiest to build on decks. Instead of three posts, the V3 features dual negative poles, and a positive block. This allows much more access, not to mention it's easier to clip leads, and get those rockin and rollin sexy center builds without any frustration. The negative posts are milled and rigid, with the positive block sitting comfortably, not budging an inch. The post holes are slightly larger than the v2, which makes lower gauge wire builds a breeze. The one thing I liked about the v2 was the screws never backed out (until they got stripped), and surprisingly, these are some beefy phillips. Three days later and I have not had to adjust the screws once, and my build has remained perfectly seated still.

The V3 is by no means an innovation, more-so a much needed correction, but if you're a fan of the line, it's worth upgrading. If you can live with the awkward screws, you may not need it, but if yours are worn and stripped, or you're tired of wishing for more hands, pick this up. It is everything you love about the V2, with all that you wanted to begin with. If you're looking for some serious cloud chasing ability AND even better flavor, it's hard to deny the V3.   What more could you want?

Serious airflow? Check.
Kickass deck?  Check.
Deep juice well? Check.
Wide bore drip tip? Check.
510 drip tip compatible? Check.
Authentic AND affordable? You bet your ass.


At 24.99, it's a steal, remaining at the top of the list when it comes to affordable, reliable atomizers. Hell, for under a hundred bucks you can get the IPV2 and the v3...an absolute kickass combination, by the way.


Thanks for reading guys, hope you enjoyed. You can find everything listed and more over at www.alluringvapors.com. Jonathan carries a wide assortment of products and is a straight shooting, stand up guy. Thanks again for the opportunity, and thank YOU for reading!


Tuesday, February 10, 2015

Gunz Blazing 26650 mod


Today I'll be going over the Gunz Blazing mod. My good friend at www.smokenmist.com sent this over to me for review, and I've got to say, it's a damn good mod. Be sure to check it out, at 37.99, it is one of the best deals in vaping PERIOD.


Specifications


  • Heavy Duty 26650 Mechanical Mod
  • Comes with metal insert to fit all your 18650 batteries
  • Solid copper contact pins for maximum conductivity
  • Made from surgical grade aircraft 304 stainless steel
  • Ultra Low voltage drop
  • Unique styling that fits comfortably in your hand
  • Knurled Locking Ring with Beautifully Smooth Spring Loaded Switch
  • Machining is Amazing

Packaging

For a clone, the Gunz Blazing sports some of the sleekest packaging I've come across. It is delicately placed in a very nice protective box, embezzled with the logo. Inside the box is a felt liner, and the mod itself is stored in a huge, felt, grey mod sock. It is elegant, but simplistic; premium, however minimal. The sock is a great addition to a stellar piece, as you can carry it around knowing it is safely protected. Right out of the box, I'm impressed.


Build Quality

Okay, I'm going to go on record and say this is the best clone I have ever held in my hands,. Everything about it absolutely commands your attention, demanding that you admire it's wonderful craftsmanship, it's intricate but minimal design. Let's start by going over the main tube...it is a brick. This much stainless steel weighs a metric fuck ton, and I can safely say if you ever find yourself in a dire situation, fending off a would be attacker, one club to the head with this thing would probably render a person comatose. It has the sort of heft you come to expect from a well made product, something that when you hold in your hand, you know is of great quality.

The tube itself is similar to a panzer blackhawk with it's rigid threaded pattern and the "Gunz Blazing" logo in it's ornate glory adorned alongside tube. The logo is laser engraved, but it definitely looks like it'll withstand many, many handlings. I like that it has a familiar feel with an edgier take, as the panzer series is a personal favorite. Alongside the top cap, and just above the bottom cap, you will see some knurling, which is both attractive and functional when you're interchanging pieces.

The threads are the main tube are extremely well machined; so much so that I'd believe this was an authentic if you handed it to me. The top cap threads in and out without even a hint of resistance, and this was AFTER weeks of no thread lubrication. The switch slides in with comparable ease, offering piece of mind in knowing that the threads will hold up for ages.

The switch itself is nearly identical to the blackhawk, however it has knurled, which provides an easier grip when removing and reinstalling. The switch itself boasts solid copper contacts, which absolutely kicks ass - this thing hits like a monster. It is a spring loaded mod, the spring itself being ridiculously thick, no chintzy clone business here.

The top cap itself is knurled as well, featuring an adjustable copper contact. The contact threads in and out with ease, as does the switch, thanks to the wonderfully machined knurling. Each atomizer sat flush, with a few exceptions - the magma coming to mind, as well as doge.

Lastly, the gunz blazing includes an aluminum tube adapter that lets you use an 18650 battery instead of a 26650. I personally don't own any 26650s, so this is awesome addition. The adapter is solid alumimum, which slides into the main tube just like a battery would. It is a perfect fit with all 18650s I've thrown at it, and when the switch and top cap are adjusted accordingly, their is no noticeable battery rattle.

All in all, the Gunz Blazing is a premium mod, with a clones price tag. Unbeatable. Unfathomable, really. Seriously. This isn't biased, people. You've got to get your hands on it.

...........buuuuuut how does it perform?!

Performance

It hits like a truck on steroids. Aptly so, as it weighs nearly as much as a truck, constructed out of metal probably better than my last car was. Thanks to the solid copper contacts, their is little to no voltage drop, leading to some super serious, kick ass conductivity. Every atomizer I threw at this thing roared like a dragon outta hell, be it super sub ohm builds or your standard 1.0 ohm+ builds. It fits perfectly in the hand despite it's size and weight, of which is largely acceptable due to just how well it performs. This is my go-to mod when I'm not rockin my regulated
boxes, and it definitely holds up to my daily punishment. It fits nicely in my pocket and after a while, I started to not notice its weight. Plus, if somebody tried to rob me, I could totally give them a wicked concussion, so it's a win win situation.

Verdict

If you're in the market for meticulously well made device that can withstand abuse, be used in 18650/26650 mod, and hit like tyson, look no further. I have kept away from 26650s due to their size, but after a few weeks with the Gunz Blazing, one thing is clear...

SIZE DOES MATTER.

At 37.99, you can't go wrong, so do yourself a favor and PICK ONE UP TODAY!

Sunday, February 8, 2015

Stingray X


The Stingray X by Infinite is a bit of an old mod - despite being the latest revision of the stingray, it has aged considerably, perhaps surpassed by the latest and greatest currently on the market. I, for one, find it to be an oldie, but a goodie. At 43.99, it's one of the best deals you can get at MtBakerVapor. Let's get to the review!


SPECIFICATIONS 

  • 1:1 clone
  • 510 threading connection
  • Copper body wrapped with stainless steel
  • Copper top cap wrapped with stainless steel with floating pin and vent holes
  • Bottom magnetic firing button, the locking ring is NOT reverse-threaded
  • Silver plated copper battery contacts
  • Comes with a hybrid adapter and a 510 drip tip
  • Houses single 18650/18500/18350 battery (batteries sold separately)
  • 22mm external diameter
  • 18.5mm internal diameter


Packaging

This will be brief, as the Stingray X came packaged in a black box, with the infinite logo. Inside the package, was as follows

x1 Stainless Steep drip tip with copper accents
x1 Stingray X Mod
x1 Hybrid Adapter

I'd like to mention I got a "clone of a clone" last summer when this was the hottest mod on the market, and that came with a stylish gift bag with two compartments. The packaging isn't elegant, it isn't lavish, but it works. Rest assured your mod will come safely packaged, containing all the necessary components to function properly.

Build Quality

The Stingray X is constructed out of copper with a stainless steel plating. With this, you get all the conductivity of copper, but with the durability and appeal of stainless. The particular model I received is black coated, which is extraordinarily sleek and attractive in my opinion. The black finish is well done, and after nearly two weeks of consistent use, I have yet to observe chipping or any other deterioration in the paint.

The threads on the device are a bit on the crunchy side, and I would say this is a your mileage may vary problem. Stingrays, while proven workhorses, are notorious for quite a few kinks. This particular model has a bit of crunchiness when sections of the tube are threaded in, as well as the hybrid adapter. The hybrid adapter does require a bit of force to remove, so personally I'd recommend diligent maintenance on your threads to prevent seizing.

The copper used is rather thin, and exceptionally delicate - by now, you should know copper rarely serves a drop, but it goes without saying - please try to avoid dropping this. My previous stingray x dented from a foot or so drop onto carpet. Not to say that this particular model will, but I am not taking the chances. When you're interchanging tubes, or removing the button etc, try to do so on a level surface, like a table, or workspace, to ensure you do not drop it.

The hybrid cap is a great addition, but use caution - if you use it improperly, serious damage to your battery and person can occur. Ensure that EVERY atomizers 510 protudes beyond the threads of the device - if it is flush with the cap, or recessed, you will create a hard short. It is dangerous. Be warned. When used safely, hybrid caps are amazing. Direct to battery contact allows for near zero voltage drop ensuring optimal performance. The top cap, however, is just as good - featuring silver plated copper contacts. It is floating.

One of the best things about the stingray X is that the button was remarkably decent, and after a few weeks of super-sub ohm builds, the magnets still hold up fairly well. It can get a bit crunchy, and it is a little temperamental, but it is the nicest stingray button I've personally used (as far as clones go.) The throw can be adjusted short or long, it will usually fire regardless of finger placement, and it does not get stuck. I have always wanted to see heavy duty springs in the stingray, but unfortunately, magnets will have to do. Button assembly is simple and painless, and if you've used one stingray, you should know the ropes by now. Another plus is, of course, the stainless plated copper contacts. This thing is all around very conductive, and built well enough for daily use.

Performance

By now, you're probably wondering how does it perform. Well, I'm happy to say that it is a true workhorse, and a reasonable powerhouse. The benefit of a copper mod is ultra-conductivity, low voltage drop, and overall better performance than other materials on the market. Thankfully, with the X, you get the benefit of copper, and the added protection of stainless - the plating really sells the device, geared towards people who WANT the advantage of copper WITHOUT having a solid copper mod.

It hits like a freaking train. I know the expression is a tiresome one in the community (seriously, most mods will hit like a train given the right circumstances/quality of machining and material) but with the hybrid cap, copper contacts, and copper construction, it's hard to argue that this thing performs very, very well. It is my go-to device when I'm looking to super-sub ohm and chase clouds, but due to it's extraordinarily short profile, it is also the perfect stealth setup - in 18350 mode, it is barely taller than an 18650. Paired with an exceptionally small atomizer (the derringer anybody?!), you've got a killer combo that is ultra portable, ultra conductive, and wonderfully stealthy.


VERDICT

If you're in the market for a well made, conductive, all around great performing mod, you can't go wrong with the Stingray X. As long as you keep up routine maintenance, keep your threads and contacts clean, it should last quite a long time. It's a cloud machine, a work horse, a stealth setup, and all around a device that should be in any collection. I personally believe it to be the best clone MtBakerVapor currently stocks, and if you'd like to see more options in the future, pick it up today !

Monday, February 2, 2015

Sub Tank

Hello everybody! Today, I'll be sharing my thoughts on the Kanger SubTank that MtBakerVapor graciously gave me the opportunity to do so! Lets get to it!


The Kanger Sub Tank is KangerTechs answer to the Aspire Atlantis - sub-ohm capability in a clearomizer....but their's more. One thing the Atlantis lacks is a rebuidable section - something that the Sub Tank has, and executes well. Users have the option of using pre included coils ohming in at 0.5 and 1.2, or you can build your own coil, kayfun style. Many are wondering who came out on top - the Atlantis or the Kangertech. Personally, they both have their flaws, but one thing is sure - vaping is evolving, and the advancements we're seeing are pretty kickass. Let's go over the tank.


Kanger SUBTANK Clearomizer
Thread Type: 510
Tank Capacity: 6ml
RBA Capacity: 4.2ml
Tank Material: Glass tub and Stainless Steel


Packaging

What I like most about the packaging is  that this thing is packaged beautifully - immediately upon removing it from the envelope, I knew I had a quality piece of hardware. I wish I could show off the internals and how neatly everything was tucked away, but come on guys - I tore into this thing! The box is gigantic. Inside, you'll find

x1 Subtank
x1 0.5 ohm OCC (organic cotton coil)
x1 1.2 ohm OCC (organic cotton coil)
x1 RBA coil
x1 RBA connector
x1 1 screwdriver
x2 screws
x1 manual
AND some organic Japanese cotton!

To be brief, the contents are packaged securely, the manual is surprisingly well written, and the overall packaging just exudes quality.


Build Quality 

The Sub Tank is built like, well.. a tank. The 25mm version is pretty hefty, what with it being completely stainless steel. The tank boasts some incredibly thick pyrex, and although I'd advise you never drop it, something tells me it could withstand a fall or two better than previous KangerTech tanks. The upper glass is secured by a glaringly red o-ring, something you will love or completely hate. The bottom is secured by threading into the base which seats your coil, and personally I think these are some very, very well machined threads.

One slight drawback is that the base of the Sub Tank clocks in at 25mm - it will not sit flush on your standard 18650 modes, but it does look incredibly sleek on a majority of boxes, as well as 26650 mods. The 510 is spring loaded, and I recommend staying away from hybrid connections - I fried a battery by trying to use it in hybrid mode, and although it could have been a fluke, I will not be taking the chance again.

RTA top-portion

If you wish to use it in clearomizer mode, simply remove the base, and install your coil. If you wish to use it in RTA mode, you must unscrew the upper portion of the tank, and install the shorter version built to accompany the chimney and deck of the RTA section. The screws thread in and out easily, but they are pretty cheap - quality screwdrivers only. The included RTA section is than threaded into the same place you would install your coil. The RTA deck itself feels incredibly sturdy, with well machined juice wells. The chimney, however, is kind of thin for stainless - though I have yet to have a problem threading it, I'd recommend caution and a light hand - I can definitely see it seizing with too much force. I'd also like to mention that you should probably pickup some knurled screws, as I had very little success trapping wire thinner than 26g - the included screws are just too small.

One thing I would like to point out - and this is the only negative thing I have to say about the device - is that the included manufacturer coils are indeed chrome plated brass. It goes without saying it is a cost cutting method, entirely stainless steel coils just aren't practical - however for safety reasons, exercise caution. Brass may contain lead, and lead + acidic juice + high temperatures = not a good time. I was able to reveal the brass with a screw driver, but over the course of two weeks noticed no chips in the chrome otherwise. I would definitely recommend routine examination of your coil in between top ups, discarding it if you see any of the plating flaking off. Is it dangerous? Well, the studies aren't out, and we have yet to see ANY case of lead poisoning...but it's better to be safe, than sorry!


Performance (clearomizer)

The clearomizer mode is probably my favorite setting. Essentially, the concept is as simple any other bottom coil tank. You unscrew the base, fill up, and install your coil...similar to the pro tank 2, 3, aero tank, etc. Who would've thought that after getting into mechanicals and dripping, I'd find myself with a kanger tank?

Let me just say....it kicks ass. The clearomizer section holds 6ml of juice. It has three airflow settings, and although the widest setting is just a bit tighter than the Atlantis, it still can chuck some pretty impressive vapor. I found that even though air flow was a bit restricted, the flavor was out of this world - thanks to the organic cotton nestled inside the coil. It has an incredibly pure taste, so much so that I began to like juice I previously couldn't stand in other tanks!

I prefer the 1.2 ohm coil, at 22.5 watts it is a great balance of vapor and flavor production. I found that the 0.5 ohm had to be run at a similar setting, not able to handle much power. I managed to get a few burnt hits around 32-35 watts, so make sure to stay under 30. On the other side, it's great for those looking to conserve their battery, as it isn't as "power hungry" as the atlantis.

What I like most about the clearomizer setting is with such a large capacity, it is easy to fill it up and take it with you when you can't drip - running errands, driving, etc. This thing + my Cana 30w is a god send in traffic, saving me from every having to drip at a red light again! I love the fact that I can leave it in my car, hop it, and be good to vape. I'd also like to mention it has not yet leaked a DROP of e-liquid, something I was surprisingly impressed by.

To be perfecting honestly, this thing is revolutionary. To think that just last year, most of us were using the iClear 30, evod, pro tank 2, etc. It's remarkable how fast the industry has evolved!

Performance (RTA mode)

Just when you thought it couldn't get any better, the Sub Tank also capitalized on the RTA craze, providing a seperate deck that allows the user to build and install their own coils! It performs very similar to a Kayfun - the deck has a positive and negative terminal, with the coil leads being "trapped" under each wire. I will go out and say I absolutely hate building like this, it is a royal pain in the ass, but that's just me - I was never good at building kayfuns. Once you have your coil installed, you than feed your cotton through, saturate it, making sure not to block your juice channels. Than, you take the RTA "cover" and screw it atop the base - ensuring that no part of your coil touches it - and than install your chimney. In order to use the RTA base, you must remove the top section of the Sub Tank and install the smaller portion, which is as simply as unscrewing and screwing two screws. Essentially, this works works like so

Coil is installed, tank is full. Your wick rests above the wells, and as you vape, the positive pressure inside the tank changes, pulling juice to the wick. When you stop, the vacuum that you created pulls the liquid back to the tank. Essentially. I personally recommend you look up a video on proper building/wicking technique, as it can be tricky - with higher VG juice, I had trouble with dry hits. 

Fortunately (for me) this isn't a building tutorial - once I got a good build going (I personally found my favorite setup to be twisted 28g wire, 8 wrap, wicked with organic cotton) this thing performed as well, if not better, than any kayfun I've ever had. When you get it going, it wicks incredibly well, and dry hits become a thing of the past - though it is a lot easier if you use a 60/40 vg/pg juice, or 50/50 - it can struggle with max VG.

The flavor is incredibly robust, bringing out notes in juice I couldn't detect before. It does have restricted air flow, but I was able to comfortably do lung inhales without too much trouble. I did have to keep it wide open, as anything less was a bit uncomfortable for me. To those of you who enjoy the kayfun experience, you will feel right at home with the Sub Tank - it performs as you'd expect an RTA too, chucking out tons of flavor, and respectable clouds. I kind of wish it had a larger capacity, but honestly it wasn't too much of a hassle. Refilling is done by unscrewing the base, which is great, because I hate messing around with leaky fill ports. In RTA mode, it did leak once, but it was my fault - make absolutely SURE the screws that hold the top portion of the tank are completely secure, or you will loose pressure and have a bad time.

Overall, the subtank was a very pleasant surprise - Aspire shook the world up, but thanks to their vision, us consumers are subjected to innovation at nearly every corner, with the Sub Tank being at the fore front of just that. It's sleek, it's a quality device, and it isn't overly complicated. In clearomizer mode, it performs wonderfully, and in RTA mode it is equally impressive. I love that Kanger included the RTA base, as it provides a huge variety in one small package. I do wish that they would get rid of the damn brass, 'cause if they did, they'd have one of the absolute best pieces of vaping hardware on the market. Do I recommend a purchase? 

Are you looking for moderate airflow, great flavor, and respectable vapor from a clearomizer? 

Are you looking for a quality built tank?

Are you looking for something to use when you can't drip, something for when you're on the go?

If you answered yes to any of those questions, it's a no brainer - pick this thing up TODAY. Just please, PLEASE keep an eye on those coils - routinely inspect the chrome for chipping, and if it does, discard it. It may not hurt you, but it is better to not take the risk!

www.mtbakervapor.com has it in stock for 38.99, and you can use coupon code VAPOCALYTPIC for an additional 10% off. What are you waiting for?! GO GET ONE!


Tuesday, January 13, 2015

Cana DNA 30w + Magma RDA review

Hey there! Today, I'll be going over the Cana DNA 30w box mod, as well as what I believe to be it's soul-mate, the Magma RDA. I'd like to thank Michael and Mikaela over at MTBAKERVAPOR for the opportunity.


Specifications


Features:
  • Compact size ~2.0"L x 1.0"W x 3.4"H
  • The separate up and down buttons allow for wattage adjustment in 0.1 watt increments
  • Uses a single 18650 Battery
  • Flush 510 connector
  • Flush dome style Fire Button
  • Wattage can be adjusted from:
    • 7w-20w on AW IMR and Panasonic CGR batteries 
    • 7w-20+w on Sony VTC5 batteries
  • Atomizer Resistance: 0.3Ω-3.3Ω 
  • OLED display shows battery level, voltage, watts and ohms
  • Micro USB charger & tiny screwdriver included
  • Able to fire 30watts at any ohm resistance in the range listed above


With the influx of 50w, 100w, and even 150w+ mods, a lot of us are beginning to forget about the original king of the watt game - the DNA 30 the CANA does not feature an authentic DNA 30). At it's peak, the DNA 30w chip stood tall atop the mountain, reigning supreme. As time passed, however, we as a community began to want more - more wattage, more volts, more power. Some of you out there may be chuckling at the thought of bringing your Cana 30w back into rotation, yet a vast majority of the community rarely go above 20 watts - so like fine wine, this is a device that is sure to get better with age. Let's get down to the review.


- Build Quality

Well, the build quality is sure to be on everyone's mind, considering it is a clone of the wildly popular Hana Modz DNA30. I have seen the original, and I can tell you, this is of similar build quality - it is not as meticulously put together as it's authentic counterpart, but it is clear that a LOT of work went into manufacturing the device.

The cana 30w board is housed within a very sturdy piece of aluminum - the 510 connector, firing switch, and wattage buttons are all very well drilled, and seated nicely. The box itself is rather small, fitting comfortably in the palm of your hand. Within the box, you have your battery sled, chip, and wiring.


One thing I'd like to point out, is the screws securing the back door are a bit wonky - if you use the blue screwdriver included, you will end up with a stripped screw. As long as you use a high quality driver of appropriate size, you shouldn't run into a problem - I have noticed others complain about stripping, but I have yet to have this problem. I'd recommend gently removing and and reinserting, as well as using quality tools.

As you can see, it is a very seamless design. The battery sled is seated comfortably, and the solder job isn't half bad - it is not as well done as other boxes out there, however if you're handy with a soldering iron, it should be a walk in the park to touch up the connections - if necessary. The board itself is housed in an enclosed space - it is hard to make out in a picture, but the wiring does seem to be a bit cramped - I like to assume because it is a very small enclosure. That however, is nitpicky at best - if you know your way around an iron, you will find yourself at home if you run into a problem, such as a weak connection, or loss thereof.

The battery sled itself is quite sturdy, however it could do with a ribbon - after about a week of use, mine began to rattle within the housing - I suspect this is because of the force required to remove the battery, as the contacts are not spring loaded, or afford any "give." Worst case scenario, you're looking at soldering the connectors to the sled if you run into this problem. In all honesty, I'd recommend dedicating a single battery to the device, and charging it via USB to eliminate the problem.


The buttons on the Cana are a pleasure to use, affording a clicky, tactile feel. They're rounded, located on the side of the box - one for power, one to lower wattage, and one to increase wattage. Some complain that they're too small, however I find them to the perfect size - they're firm, easy to press, and seem to be of high quality.

The 510 connector is flush dome style, 22mm, which is great - every atty I have thrown at it have sat flush, and beautifully.

The LCD screen is nicely done as well - the readout is very clear, accurate, and well placed. The readout will display your battery life, voltage, wattage, and ohms. This is useful if you're trying to hit a target wattage, or want to know your battery life at a glance.

I cannot comment on the board itself - I have not opened the casing to examine it, however it has yet to give me a single issue - no random firing, no error in firing, etc. I know people who have had the device for quite a long time, and these boards seem to kick for quite a while.

Outside of the iffy soldering and stiff sled, the inside of the box is very well done - functional, simple, and appealing.

- Performance

Nothing quite like a Ferrari with a blown engine - similarly, this device can be as beautiful as it wants, but how does it perform?


Yup, the Cana 30w performs as well as it looks - if you configure it correctly. You see, in order to take full advantage of the 30w chip, you want to your build to hit a target resistance. The box itself regulates power, converting your wattage to volts, it goes a bit like this...

Wattage set -> Ohm detection -> voltage adjustment.

It can get a bit confusing, but it is nothing you can't wrap your head around - with a basic understanding of ohms law (something I suggest you know like the back of your hand) and electrical knowledge (feel free to study), you will have a better understanding on the concept. For the sake of simplicity, I'll break down the build I have

30g twisted 2mm coil, 11 wraps, hitting a target resistance of 1.6 ohms. At 30 watts, the box converts the output amp limit to 6.9 volts - a bit shy of the 8.3 max output, but still pretty powerful. When using a coil with a high surface area, and a higher resistance, you are able to fully utilize the potential of the box. 

SO, with that in mind, it goes without saying - if you're looking to sub ohm on this thing, don't. 30w is a great amount of power, but for builds in the .02 - 0.7 range, it is kind of useless. With the cana, you want to build higher, in order to fully optimize the volt capacity the chip affords, and when you do...it's pretty amazing.

With a 1.6 ohm coil, I get dense, thick, flavorful vapor at 30 watts - however keep in mind, that just because you're building higher, does not mean you're getting more battery life - higher wattage requires more amperage, which equals a faster draining battery. I can get about a days use on the cana, but no more - you definitely want to invest in a high drain, preferably new battery, if you'd like to utilize it's full power.  

With all the electrical talk out of the way, at 30 watts, the cana simply rips - it performs very, very well. If you're not yet looking to get into rebuildables, it performs equally well with clearomizers - the nautilus mini with BVC coils is heavenly to use around 18 watts, producing satisfying vapor and amazing flavor. In my opinion, the box shines at full power, but is definitely no slouch to use in the 15 - 25 watt range, offering a very pleasant vaping experience.

In my opinion, the Magma RDA was built for this mod. I'll give a quick run-down on the magma, but it is a staple in plenty arsenals, so if you're reading this, I'm sure you've at least heard of it.

Features
  • Available with Stainless Steel or Brass ring, or a full  Black Finish.
  • Extended Juice Basin.
  • 22mm Diameter.
  • Two 3mm Wide Posts. 
  • Dual Direct to Coil Airhole (around 1.5mm away from coils).
  • External Airflow Selection (1mm, 2mm, 3mm); Options for Single or Dual Airflow. 
  • Poles are Welded to the Base for Durability.
  • Positive Insulator Hidden in the Base to Avoid Melting
Threaded Dome Chamber Top Cap 


The RDA itself is exceptionally well bit. The threads are very clean, the posts are incredibly sturdy - they're welded to the base, so you should not see wobble. For a clone, I was very impressed - a friend of mine had the authentic, and they're near identical, sans the logo - this particular magma is logoless, which I find sleek and appealing. I feel that the magma is one of infinites greatest attempts in the clone market - it is 1:1, and performs just as well as the authentic.

Thanks to the domed chamber top cap, the magma manages to pull off incredible, out of this world flavor. I've yet to find an RDA that can stack up to it in terms of flavor - sure, 3mm airflow isn't exactly for cloud chasing, but it surely no slouch in the department. With a 1.6 ohm coil, air flow wide open, set to 30 watts, the magma absolutely rips - flavor and vapor that are hard to beat. Nowadays, a lot of rebuildables are opting for quad posts, huge caps, chuff tops, and crazy airflow. While I certainly love those, it's important to not loose sight of the other end of the spectrum - clouds are great fun, but sometimes...you just need some FLAVOR. Look nowhere else, people. I firmly believe the Magma should be packaged right alongside the Cana, or any box mod for that matter.


- Verdict

Let's take a look at the pro's and cons

PROS
  • Nice construction
  • Responsive buttons
  • LCD readout is accurate and easy to navigate
  • 30 watt
  • Flush 510
  • Sleek and compact

CONS

  • Soldering can be hit or miss
  • Battery sled is stiff
  • Device must be put to sleep (click five times) and awoken (click five times) - would be nicer if you could just turn it on and off on a whim
In the current market, I'd definitely recommend a purchase if you can find it sub ~60 dollars. It's a

well made device, but it does have a reputation - some use it as a daily driver, others are addled with woes. I personally have yet to encounter a problem, but remember - these devices are from china (as with the majority of equipment) where quality control isn't exactly protocol. Just because mine performs well, does not guarantee that your's will. Be sure to inspect your devices 510 connection, threads, buttons, and solder points to make sure that it is in good working order. Never throw a questionable build at the device - it does have short circuit protection, but it is a clone board, and electronics can fail.

www.mtbakervapor.com has the CANA in stock for 58.99 - use coupon code VAPOCALYPTIC for 10% off, and the LOGOLESS Infinite Magma for 23.99.